Do you want to create a Palworld dedicated server for a seamless experience? A dedicated server provides individuals and their friends with a consistent and stable gaming environment where games run smoothly without interruptions, and players can join and leave without affecting the game’s progress.
This article provides a comprehensive guide on “how to make a dedicated server in Palworld,” from covering the Palworld Dedicated Server manual process, setting up the Palworld server by Steam, joining the dedicated server Palworld, saving & closing the devoted server in Palworld, No password has been entered issue resolvance to Configure Palworld server.
Let’s dive in!
How To Make A Dedicated Server In Palworld Manually
A Palworld dedicated server lets players get the most fun from online multiplayer. It can accommodate up to 32 players, who can come and hang out, create guides, and work against or with each other. A Palworld community server is registered as a dedicated server in the game client or server list. Community servers differ slightly from dedicated ones appearing on the game client’s server list. You require technical reliability and connection speed to ensure smooth gameplay and gaming experience. In this case, a dedicated server is the best and foremost choice.
Follow these steps to make a dedicated server in Palworld Manually:
1. Palworld System Requirements:
A. Hardware Requirements:
- Computers with sufficient CPU, RAM, and storage (50GB minimum) can handle multiple players.
- Reliable and fast internet connection or server hosting.
Palworld’s minimum requirements are a Windows 10 64-bit OS, an NVIDIA GeForce GTX 1050 Graphic Card, an Intel Core i5-3570K CPU, and 16GB RAM; 32GB RAM is recommended.
B. Network Configuration:
- Static IP Address: Set a static IP address for your server machine. This ensures optimal game server performance and internet speed, providing a seamless experience and server stability.
- Port Forwarding: Forward the router to your server IP address.
For Palworld, these are ports for steam requests or more for game traffic (TCP\UDP:27015) and the server public port (TCP\UDP:8211).
2. Install Necessary Software:
A. Operating System:
- Windows: Ensure your Windows OS is up to date.
- Linux: Update the package list and ensure the OS is up to date.
B. Required Software:
- For Windows, Install the latest version of a .NET framework or install Visual C++.
- For Linux: Install Mono or any other required software.
3. Download Palworld Server Files:
A. Get The Server Files:
- Obtain server files from the official Palworld website or a trusted source.
- Extract files to a dedicated directory on the server machine.
4. Configure The Server:
Do the Palworld server config settings by these steps :
A. Locate Configuration Files:
- Usually, in the server directory.
- Look for files with extensions like “ini” or “cfg.”
B. Edit Configuration Files:
- Open Configuration files With a text editor( like Notepad for Windows, Nano for Linux).
- Modify Palworld dedicated server settings like server name, Max Players, game mode, and ports.
- Example setting to adjust.
[ServerSettings]
ServerName=YourServerName
MaxPlayers=20
Port=7777
C. Port Forwarding:
- Login to the router admin panel.
- Find the port forwarding section and forward the game port to the server’s static IP address.
For Example:
- Port: 7777.
- Protocol: UDP.
- IP Address ( Your Server IP).
5. Launch The Server:
Launch the server with these steps in Windows or Linux.
A. Windows:
- Open the command prompt.
- Navigate to the server directory.
- Run the server executable.
PalworldServer.exeB. Linux:
- Open terminal.
- Navigate to the server directory.
- Make the server script executable.
chmod +x startserver.shRun the server script.
./startserver.sh6. Verify And Manage The Server:
A. Verify Server Status:
- Check the server console output for any error or server message.
- Ensure the server is running and players can connect
B. Manage The Server:
- Use the server console to issue commands and manage the server.
- Monitor server performance and logs for any issues.
7. Additional Tips:
- Background Configuration: Regularly backup your configuration files.
- Security: Set a strong password for the server to prevent anybody from accessing it. Regularly update server software to patch security. vulnerabilities. Use firewall rules to restrict access to the server. Ensure the server machine has appropriate security measures like Firewall and antivirus.
- Updates: Download the latest server and game files from the official source.
Replace old service files with new ones, ensuring your configuration and saved files are overwritten. Then, restart the server to apply the updates. Following these steps, players can easily set up a dedicated server in Palworld. In case of any issues, refer to the official Palworld documentation.
Setup A Palworld Server By Using Steam
Understanding the Palworld default server setting is essential for an optimal Palworld community server setup. Learning how to write on a sign, Palworlds further enhances in-game communication and organization.
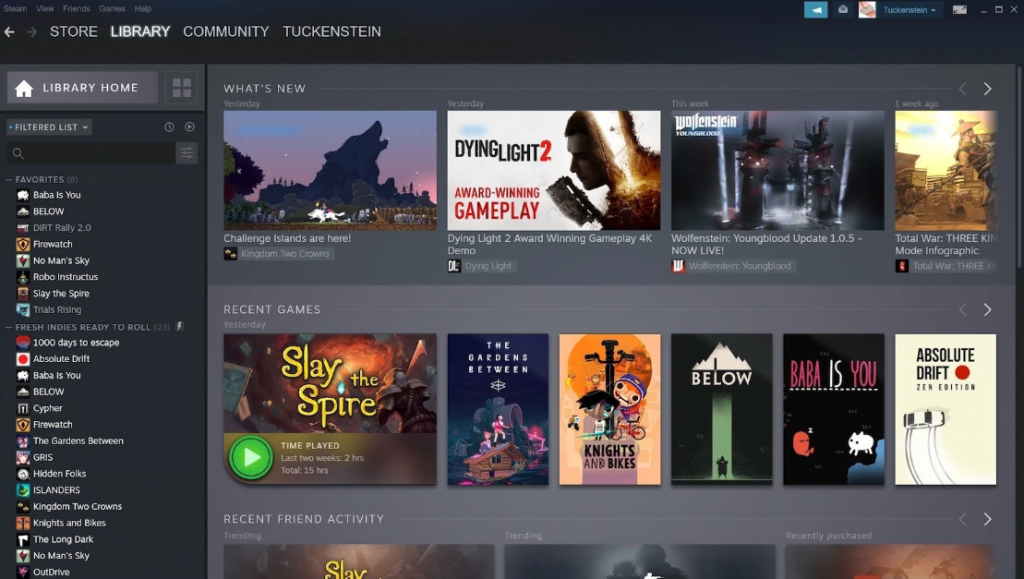
1. Access Steam Library:
- First of all, open Steam and go to the library.
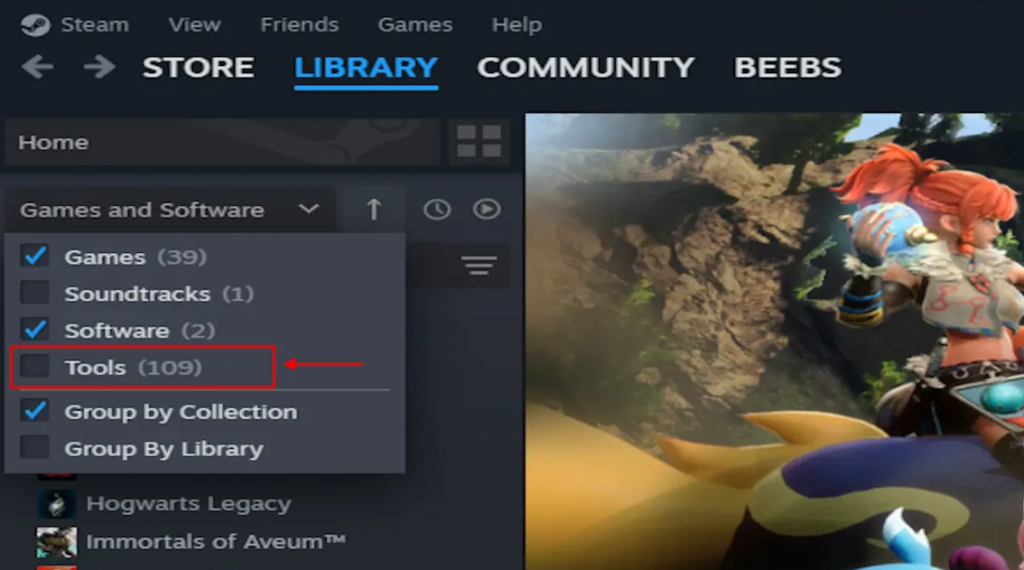
2. Navigate To Tools:
- Click on the “Games” drop-down in the left corner.
- Select tools.
3. Search for The Palworld Server:
- Use the search bar to find Palworld.
- Look for the Palworld dedicated server and then click on it.
- Install the dedicated server.
4. Locate Server Files:
- Navigate to the installation folder ( local disc> program files >Stain> steam> steam apps> common> pal server).
5. Launch Palworld Server:
- Open the Palworld server folder and double-click on the Palworld server application to launch it.
6. Adjustice Palworld Server Settings:
- Open the default Palworld server setting file in a text editor.
- Copy and paste the settings into the PalworldSetting.ini file in the pal saved config folder.
- Customize server name, description, and another setting as needed.
7. Save and Launch Server:
- Save the changes to the “Palworldsetting.ini” file.
- Return to the “Pal Server” folder and double-click the Pal Server application to launch the server.
8. Configure Port Forwarding:
- Login to the router dashboard (visit portforward.com if somebody does not know about the router address).
- Navigate to port forwarding settings.
- Create a new rule named “Pal Server,” set the protocol to UDP, and use it for an 8211 (Both Internal And External.
- Find your computer IP address using Google and enter it into the router settings.
9. Disable UPNP:
- Turn off the Universal Plug and Play (UPNP) in your router setting to keep the port open.
10. Configure Windows Firewall:
- Open Windows Defender firewall.
- Create a new inbound rule for Palworld port number 8211 (UDP).
- Name the role “Pal server”.
11. Connect To The Server:
- Launch Palworld.
- Go to “join multiplayer game”.
- Enter the IP address followed by “8211” and click “connect.”
12. Verify Connections:
- Check if the server is live and accessible.
- Share IP addresses with fellows or press “allow” them to join.
13. Final Checks:
- Confirm that the Windows firewall is not blocking the port.
- Verify that the router and Windows settings are configured.
Join A Dedicated Server In Palworld
If you want to join another individual’s dedicated server, then you can easily do so by doing the following steps:
- First of all, launch Palworld.
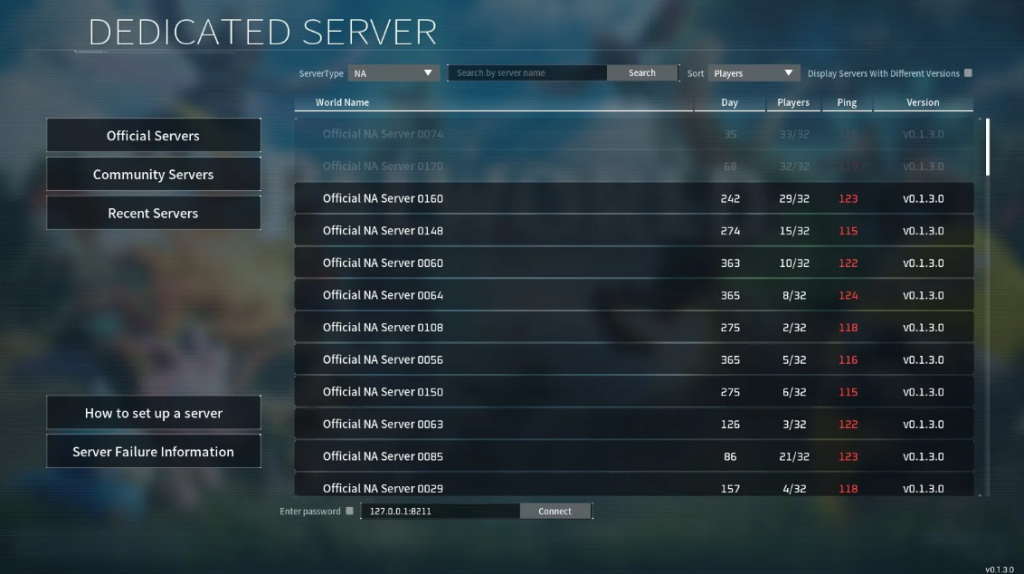
- Find the “ join multiplayer game” option from the main menu and hit on it.
- In the box below, in the Palworld multiplayer lobby, input the server’s IPv4 address and port number (Palworld Default Port is 8211).
- Set up to play Palworld on a dedicated server of your choice. If somebody can’t access it, the minimum reason could be that it reached the maximum 32-player occupancy.
1. Through Palworld Private Server:
In case somebody wants to join from their private server, follow these steps:
- Launch Palworld.
- Please find the button on the main menu and hit it.
- Select the “connect” option located on the bottom section or the right side.
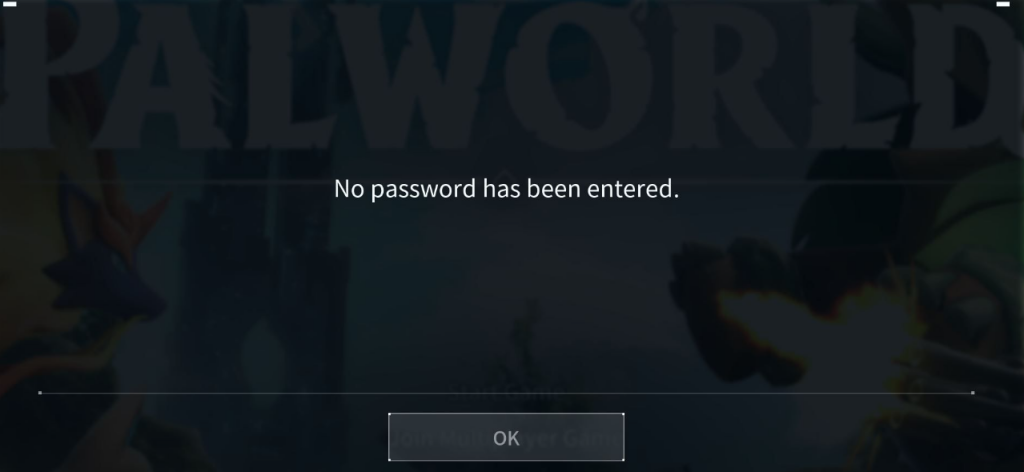
- Then we Should be all set. If you see the “no password has been entered” error message, Scroll down to read our fix for this problem.
2. Save And Close Your Dedicated Server In Palworld:
It is good that Palworld has a permanent auto-save progress feature and is used very often. The games will auto-save all progress on the server every few minutes, and individuals can verify this by periodically noting corresponding notifications in the upper right corner of the screen. Players cannot turn off this feature or change the period between saves.
3. Saving Before Exiting The Game:
If an individual wanted to save the game before exiting Palworld, there is no need to worry about that anymore. The game automatically saves progress after clicking ‘Return’ to the ‘Title’ or ‘Exit’ game.
If a person plays with friends, the saving progress repeats after each player leaves the game. The creator of Palworld gives players peace of mind about their achievements in the game world, so there is nothing to worry about.
4. Potential For Progress Loss:
The only cause an individual can lose progress, or Palworld fails to host a multiplayer session is if the game crashes. However, this happens rarely, and the person will only lose a few minutes of gameplay in the worst case. Defeating a boss in a few minutes is disappointing, and you must rechallenge it. Now, If you play with friends, you don’t have to worry about it.
5. Additional Tip:
Instead, if you want to leave the game for extended periods, it is recommended that you create a backup of the Palworld save file. To do so, go to “C: UsersyourusernameAppDataLocalPalSaveGames” and copy the saved games folder to another location.
After returning the game after a while or noticing any issues, restore progress using a backup copy.
Palworld Cheats for Dedicated Server
You can enjoy the best gaming experience with our Palworld dedicated server cheats. Here are the Palworld console commands that can boost your gaming experience.
| Commands | Their Function |
|---|---|
| /Save | Save the Palworld data. |
| /ShowPlayers | Show all players’ information in Palworld. |
| /Info | Shows info on the Palworld dedicated server. |
| /DoExit | Forcefully shuts down the Palworld dedicated server immediately. |
| /BanPlayer (SteamID) | Bans a specific player from the dedicated server. |
| /KickPlayer (SteamID) | Kicks a specific player out of the dedicated server. |
| /TeleportToMe (SteamID) | Teleports a specific player in the server to your character’s location. |
| /TeleportToPlayer (SteamID) | Teleports your character to the location of a specific player in the server. |
| /Broadcast (Message) | Sends a message to all players in the dedicated server. |
| /ShutDown (Seconds) (Message) | Shuts down the server after a specified number of seconds and sends a message alerting players. |
“No Password Has Been Entered” Error Solution In Palworld
If you have a problem with “ No Password Has Been Entered,” then you should follow the following steps:
1. Check A Server Configuration:
First, start removing the server configuration setting to verify that a password has been set for the Palworld dedicated to the server.
Access the server configuration files or interface of server management to learn the server settings and ensure that the password has been specified for player authentication.
2. Set A Server Password:
If no password is entered, then set a password for the Palworld dedicated server lag to enable player authentication and store server access.
Then, create a unique or strong password for more security practices and protection against unauthorized access.
3. Update Palworld Dedicated Server Settings:
After the server settings update, restart the Palworld dedicated server to ensure player authentication. Save updated server configuration files or settings to apply the changes and then easily activate the password protection features.
4. Restart Server:
After updating the server settings, restart the Palworld dedicated server to ensure all changes are applied. Then, check the Palworld server status and ensure the password protection feature is active.
5. Test Server Connection:
After your server restarts, you should test it to verify that the “ no password entered issue” is resolved. Attempt to connect using a password to the Palworld dedicated server to ensure access to the game world without encountering any error.
6. Troubleshoot Network Issues:
If the “No Password Entered” problem persists, regardless of setting a password for the server, troubleshoot network-related issues that affect your server connectivity. Check for network connectivity issues, firewall restrictions, and router configuration to prevent players from accessing your server.
7. Update Server Software:
After ensuring that the Palworld dedicated server software is updated with the latest patches, updates, and bug fixes, check any available updates of patches released by the game developers, then apply them to the server software to address any Known issues or compatibility issues.
Configure Your Palworld Server
Configuring provides a seamless gaming experience in Palworld, reduces lag, enhances security, protecting the server from unauthorized access and potential attacks. Configure your Pal World server easily with these three methods:
1. Using Pal World Dedicated Servers:
You can use cheats for the Palworld dedicated server to enhance the gameplay experience. Be mindful of the Pallworld chat limits and Palworld server death penalty options to optimize server settings. Use the Palworld dedicated servers tool with the game for the best server development.
A. For Starting The Server:
- Open Steam, and select the “Library” tab at the top.
- On the left, expand the drop-down menu and then select the tool.
Choose the “Palworld dedicated server setup” from the library and then hit the “Launch” option.
Select the “play Palworld dedicated server” option, locate the upward position from the “open and start as community server” option in the open dialog, and click “play.”
After the server is initialized, the command line window should appear on the screen. While you see it, proceed to connect with the server.
Note:
To see Palworld’s dedicated server tool in the Steam library, launch the Palworld game.
2. Using SteamCMD:
This method to configure the Palworld server uses steamCMD, a standard command-line version of the Steam client. It is downloaded and manages servers for multiplayer Steam games. This gives the server sufficient storage space, as SteamCMD will need to download all game files on this machine.
A. Installing SteamCMD (In Windows):
Begin by downloading and installing the steamCMD utility on a device that will be hosting your server.
- Create a folder on your PC to install steamCMD. For example:
cd C:\steamcmd- Download steamCMD for Windows from the Valve Developer Community website.
- Once you see this in the output, close the SteamCMD command line window.
B. Launching The Palworld Server:
With steamCMD set up, proceed to download and install Palworld server files.
- Open “Command prompt.”
- Using the CD command, go to the directory where you want to install steamCMD.
Example:
cd C:\steamcmdDownload the required forward files by running this command.
steamcmd +login
anonymous
+app_update 2394010 validate +quit
The success message comes once the server files are fully downloaded and installed.
Navigate to the Palworld server directory using this command.
cd
.\steamapps\common\\
PalServer
Start the server by running this command.
PalServer.exeYou should now see a command-line dialogue providing information about the server, indicating that it is running.
C. Installing SteamCMD: Linux:
Begin to continue downloading and installing the steamCMD utility on the device that will host your server.
- Individuals must run the following command to import the multiverse app repository to the Palworld system requirement repository list and add 32-bit architecture support.
sudo add-apt- repository
multiverse &&
sudo dpkg --add-
architecture i386- Update system depositories and install steamCMD with this command.
sudo apt update
&& sudo apt install steamcmd -y- Once the process is fulfilled, steamCMD is available on the system immediately.
D. Launching The Palworld Server:
With the steamCMD installed, download and install the desired Palworld server files.
- Open the terminal.
- Then, after opening the terminal, Run the following command to update steamCMD And download forward server files.
steamcmd +login
anonymous
+app_update
2394010 +login
steamcmd validate
+quit- After downloading or installing, the success message comes.
- Navigate to the Palworld server directory with this command.
cd
~/Steam/steamapps
/common/PalServer- Start the server by continuing the server script file with this command.
./PalServer.shThen, you see all the info about the server displayed in the terminal output, showing it is up and running smoothly. For further details, see this blog’s Connect to the Palworld server section below.
3. Additional Tip:
While starting the server, you might receive the following error:
.steam/sdk64/steamc
lient.so: cannot open shared object file:
No such file or
directory
To solve this problem, run the following three commands.
mkdir -p ~/.steam/sdk64/ steamcmd +login anonymous +app_update 1007 +quit cp~/Steam/steamapps/common/Stea mworks\ SDK\
Redist/linux64/steamclient.so ~/.steam/sdk64/
If you have a specified or different download directory for steamCMD, you must adjust the command in step 3 according to one’s chosen location.
Using Docker
Lastly, a person can deploy a server as a lightweight docker container. Docker can be used to containerize game servers for easier, faster, and cheaper to host and operate. Docker excels in encapsulating and isolating applications, giving each game server its environment without the overhead of the entire virtual machine. Users can use both Windows and Linux programs in docker containers.
You must install docker or docker-compose on the device to use this method.
1. Prepare docker-compose file:
To begin setting up, declare the instructions for the parts or server docker image in a dedicated docker-compose file.
A. Using Docker: (In Windows)
- Open PowerShell.
- Create a new Palworld-server folder and navigate to it using the following command:
mkdir Palworld-server; cd Palworld-server- Create a Docker-compose.yml folder and open it using Notepad by running Notepad docker-compose.yml.
- When prompted to create a file, click yes.
In Notepad (windows), paste the following instructions for the Palworld Server Docker container:
- Replace the <password> placeholder with the secure administrator password for your server.
- Press the CTRL +S to save changes.
- Exit Notepad.
2. Using Docker: In Linux:
- Open Terminal.
- Create a new “Palworld server” folder and navigate by using the following command:
Mkdir Palworld-server && cd Palworld-server- Create a docker-compose.yml file and open it using the nano text editor by running:
nano docker-compose.yml- In the compose file, paste the following instructions for the Palworld server docker container.
services:
palworld:
image: thijsvanloef/palworld-server-
docker:latest
restart: unless-stopped container_name: palworld-server
ports:
- 8211:8211/udp
- 27015:27015/udp
environment:
- PUID=1000
- PGID=1000
- PORT=8211
- PLAYERS=16
-
MULTITHREADING=true
- RCON_ENABLED=true
- RCON_PORT=25575
- ADMIN_PASSWORD=" <password>"
COMMUNITY=false
volumes:
./palworld:/palworld/- Replace the <password> placeholder with a secure administrator password for the server.
For Example:
TZ=UTC
-ADMIN-PASSWORD =SecureAdminPwd123
-Community= False
- Press Ctrl + X, Y, and Enter to save changes and exit the text editor.
3. Deploying Palworld Server:
- Navigate to the “Palworld server directory”.
- Run the following command.
docker-compose up -d- Docker continues to pull the Palworld server image from the docker hub and deploy the container.
- Once it is running, connect to the server.
Connect To Palworld Server
To connect with the newly created Palworld server, take the following steps.
- Copy the Meshnet IP address of the device hosting the Palworld server from the node VPN app.
- Launch Palworld.
- Select Join a multiplayer game.
- In the address field at the bottom, paste the copied mash net IP address followed by 8211 and click Connect.
- The server loads, and you can enjoy playing Palworld with your fellows over a Meshnet connection.
Conclusion:
As Palworld continues to evolve, a dedicated server will play a crucial role in the best multiplayer interaction and a reliable platform for players to enjoy the game at its full potential. The dedicated server in Palworld is manually set up and accomplished by preparing hardware and network, installing, downloading, and configuring the launching server. Steam setup involves accessing tools, configuring Palworld server settings, and ensuring Palworld default port forwarding and firewall configurations.
Joining a dedicated server is straightforward; you require only the server IP address and port number. Palworld’s auto-save feature ensures that individual progress is saved, and troubleshooting common errors gives a smooth connection to all players.
Following these steps, players can successfully host and manage everything necessary to run a Palworld dedicated server, creating a reliable platform for multiplayer adventures. Do you have any questions? Feel free to ask in the comments below.








Leave a Reply