Installing WordPress locally is a great way to work on new projects without spending money on web hosting. Working with WordPress on a local machine is convenient, keeps web development private, and is faster than interacting with the remote server. However, you must familiarize yourself with installing WordPress locally and wonder about managing it alone. In that case, you are in the right place to get extraordinary steps for installing WordPress.
This comprehensive guide will help you install WordPress locally. It provides different methods for Windows, macOS, and Linux using WAMP, XAMPP, MAMP, Docker, Vagrant, and LAMP. Whether you are new to WordPress or an expert developer, you will find all the step-by-step instructions here.
WordPress Local Development
WordPress Local development involves setting up and running a WordPress website on a local computer. It provides developers with a safe environment and offline facility for testing new features, themes, and plugins.
To set up a local development environment, developers must install a local server environment, MYSQL, and PHP. After installation, WordPress can be downloaded and installed locally to provide a developer-safe climate for testing and developing projects. Installing WordPress is straightforward and user-friendly, especially with guides and resources available. Users can also install WordPress manually and free from WordPress.org, upload files to the server, create a database, and then run the installation script.
Requirement To Install WordPress Locally
You can easily install WordPress locally using any method: WAMP, XAMPP, MAMP, Docker, Vagrant, and LAMP. You need no coding skills for WordPress as it offers a user-friendly interface. However, basic knowledge of CSS, PHP, and HTML is helpful. The main requirements for running WordPress locally on Windows or Mac are as follows:
Hardware Requirement:
- 4BD RAM AND 1.5GB disk space
Software Requirement:
- PHP 7.4+, MYSQL+OR MariaDB 10.1+HTTPS support, and a local server environment like Apache and Nginx.
These are some essential requirements, but more disk space is recommended due to the larger size and custom environment.
Reasons To Install WordPress Locally
There are some top-notch reasons to install WordPress locally on your computer.
Safe Environment:
Running WordPress locally provides a safe environment for new features, themes, and plugins without affecting your live site. This allows you to experiment and change without worrying about breaking the site or losing data.
Better Accessibility:
Running WordPress locally allows you to project even without an internet connection. WordPress developers can work from any location and have internet access.
Learning Curve:
If you are a new WordPress user, installing WP locally is the best way to learn how it works and practice using its features. Launch a live site. Give it a try to take your WordPress projects to the next level.
Install WordPress Locally on Windows
There are many methods for installing WordPress locally on Windows. You will need an environment that meets the WP software requirements. The user needs server software, PHP, basic hardware requirements, and a database for the WP installation.
If your database runs most software without slowing down, you can choose WordPress hosting which would be more beneficial. You can easily install WordPress locally on Windows using WAMP and XAMPP.
1. By Using WAMP
WAMP server is window-based software for local web development environments. Users can download this free software to access local websites without an internet connection or web host.
Once you know all the methods to install WordPress on WAMP, you can also create local sites using PHP, Apache2, and MySQL databases. Let’s see all the steps to install WordPress locally on Windows using WAMP one by one:
A. Determine Your System Type:
If you do not know about your computer machine, whether it is running on the 32-bit or 64-bit version, then follow these settings:
→ For window 10/11:
- Open setting.
- Press the ‘Window key + I ’ to open the setting.
- Click on ‘System.’
- Click ‘system information’.
- Scroll down and select “About” on the left side.
- Under the “ Device specification” section, look for “System type.” This will tell you about the type of computer your machine has, whether it is 32-bit or 64-bit.
→ For window 7/8:
- Open control panel: Press ‘ Window key + R’ to open the run dialog box.
- Type ‘Control’ and press “Enter.”
- Click on ‘System and security’ and then the system option.
- Look for the ‘System type’ under the ‘System section,’ which tells whether the operating system is 32-bit or 64-bit.
→ For MacOS:
- Click Apple logo> About this Mac.
- Click “System report.”
- Check under ‘Hardware overview.’
→ For Linux:
- Open Terminal.
- Type ‘uname-m’.
- Check output.
- It will show :
- x86-64 = 64-bit.
- ‘i686’ or ‘i386’ = 32 bit.
Finally, you know your computer running version, then go towards the second step.
B. Download & Install WAMP
Go to the WAMP official website and select the suitable WAMP version for the machine, 32-bit or 64-bit.
C. Start WAMP
If WAMP does not start automatically after you install it, double-click on it. Then, you will see a green WAMP icon on your clock.
If your WAMP icon is green, it is confirmed that the program is working.
D. Download WordPress
Go to the official WordPress website and download the latest version of WordPress or any required version to install.
E. Move The WordPress File To WAMP Root
Go to the official WAMP installation folder to extract all files from the WordPress archive downloaded above.
Mostly, it would be:
.wp-block-code code { font-family: ‘Robots’, sans-serif; font-size: 16px; background-color: #f9f9f9; color: #333; padding: 10px; display: block; border-left: 5px solid #151e5e; overflow-x: auto; } .wp-block-code .keyword { color: #2712e9; } .wp-block-code .comment { color: #2E9B00; font-style: italic; } .wp-block-code .string { color: #CE723C; } .wp-block-code .number { color: #00aeff; } .wp-block-code .command { color: #8B8000; }C:\wamp64\You should see a folder called “www.”
Create a WordPress folder inside the “www” folder and copy all the files from the WordPress archive inside it.
Now you have all WordPress files inside the folder as above.
C:\wamp64\www\wordpressThen, check that you followed the above step and go to “http://localhost/WordPress.”
Then you see this interface:

F. Create A New Database
To complete the setup, create a new database. There are various methods, but the most vital one is to open ‘PHPMyAdmin’ (pre-installed with WAMP).
It can be found at this address: “http://localhost/phpmyadmin/”.
Click the “New” option.
Select a name for the database and then press the “create” option.
G. Finish Set Up:
- Now you have a database available, so finish the setup for your WordPress.
- Got to “http://localhost/WordPress” again and pressed “Let’s go”.
- Then, specify the details to connect WordPress and the database created above.
- The default username comes with WAMP, ‘root,’ and an empty password.
- After completing all connection details, click ‘Submit’ to see the login interface.
- The last step is to choose an “Admin username” and strong password to manage your WordPress interface later.
- Once you have done it, hit ‘Install WordPress,’ and everything will be done.
- Congrats, you have an installation of WordPress on Windows through the “WAMP” server.
2. By Using XAMPP
XAMPP is a cross-platform solution with a top-notch local web server environment for development and testing.
A. Download XAMPP
XAMPP is a local environment for “cross-platform, Apache, MariaDB, PDP, & Perl.”
The stack has software for installing and running WP. Apache is the server software, MYSQL handles the database, and users get PHP. Installing XAMPP prevents other installations.
Go to the XAMPP download page and select the latest version of the software. After the download is completed, go to the installer.
After this, the installer asks about components that must be set up. Standard components include MYSQL, PHP, and Apache. However, you can install PHPMyAdmin and the Webalizer component to make your site easily manageable.
Now select to set up XAMPP. In which language? Take a few minutes to get everything ready.
After the installation, XAMPP will ask to launch the control panel. Click on the YES option and then go to others.
C. Configure XAMPP
Let’s start by looking at the XAMPP control panel. Then, you will see the main interface for managing local websites, such as the hosting dashboard.
Before installation, configure the Apache server to listen to the correct port; the same goes for MYSQL.
Click on Configure next to the Apache Module option, then select the Apache (httpd. conf) option. This Apache configuration file uses the default text editor.
After opening the file, use the search feature for the word ”port.” Then, you can find the section of the file that gives this.
#
# Listen: Allows you to bind Apache to specific IP addresses and/or
# ports, instead of the default. See also the  directive.
#
# Change this to Listen on specific IP addresses as shown below to
# prevent Apache from glomming onto all bound IP addresses.
#
# Listen 12.34.56.78:80
Listen 80
Search For Pot In The Configuration File
- Locate and update the line.
- Change the port no if port 80 is occupied.
Change Document Root Directory
- Find and modify these lines.
- Replace with your desired directory path.
# DocumentRoot: The directory out of which you will
  # serve your documents. By default, all requests are taken from
  # this directory, but symbolic links and aliases may be used to point to
  # other locations.
  #
DocumentRoot "/your/desired/directory"
<Directory "/your/desired/directory"></Directory>
Save And Close The File:
Configure MYSQL
- OpenmySQL configuration by clicking the Config button next to the MySQL module, then select my.ini.
- Note the port number by looking at the line and for WordPress setup.
Close The Configuration File: Start Apache and Mysql
- Click the start button next to the option of Apache and MySQL modules.
- Ensure the services start without errors.
- With Apache and MYSQL running, create a MySQL database for WordPress.
This complete configuration of XAMPP is used to set up a local WordPress development environment.
C. Create MYSQL Database Using PHPMyAdmin
- Access PhpMyAdmin:
- Open the XAMPP control panel
- Click on the MySQL—Admin button. This will open My Admin in the web browser. The URL will be something like ”http://localhost/phpmyadmin.”
- Create Database:
In PHPMyAdmin, go to the databases tab.
In the Creating Database section, enter a unique name for the database. Avoid common names like “wp-database.” For increased security, use a mix of letters and numbers.
- Set Encoding
For the encoding system, use the default option, utf8mb4-general-ci.
- Complete The Creation
Do not add the table to the database at this point. WordPress installer will handle table creation during the installation process.
D. Install WordPress
- Go and install WP’s latest version from the official website.
- After the zip folder is ready, copy and then navigate to the XAMPP document root directory. (like C:/xampp/htdocs,)
- After creating a new folder for the website, name anything.
- Open the folder, extract the WordPress, and install the zip file. When it is complete, the file and folder structure look like this:
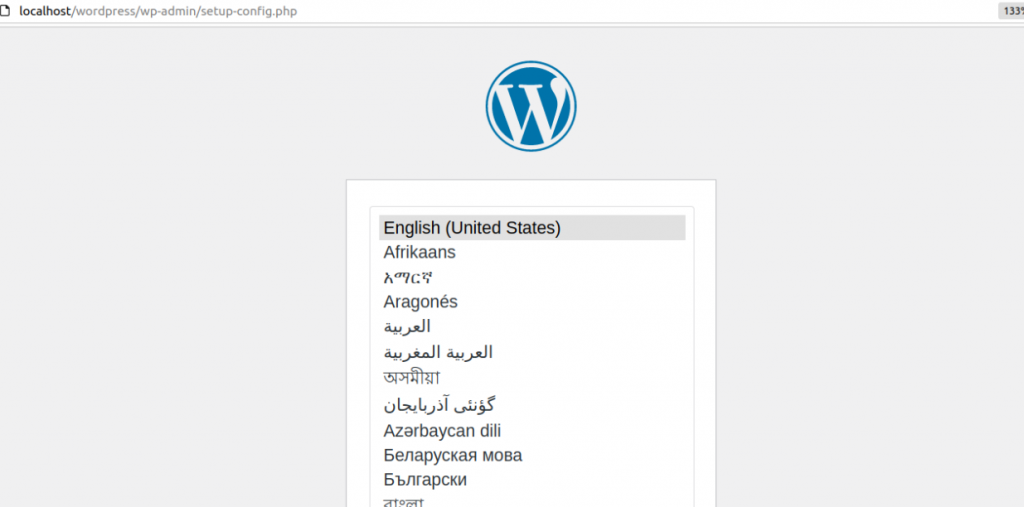
Then, run the WordPress installer. This script helps install WordPress and set up the database. To access the installer, open the browser and go to “localhost/my website/wp-admin/ setup-config.php.” Note that you should replace the website with the name of the folder just created.
After everything is set up, the browser shows the installer’s first screen. Here, you must choose a language.
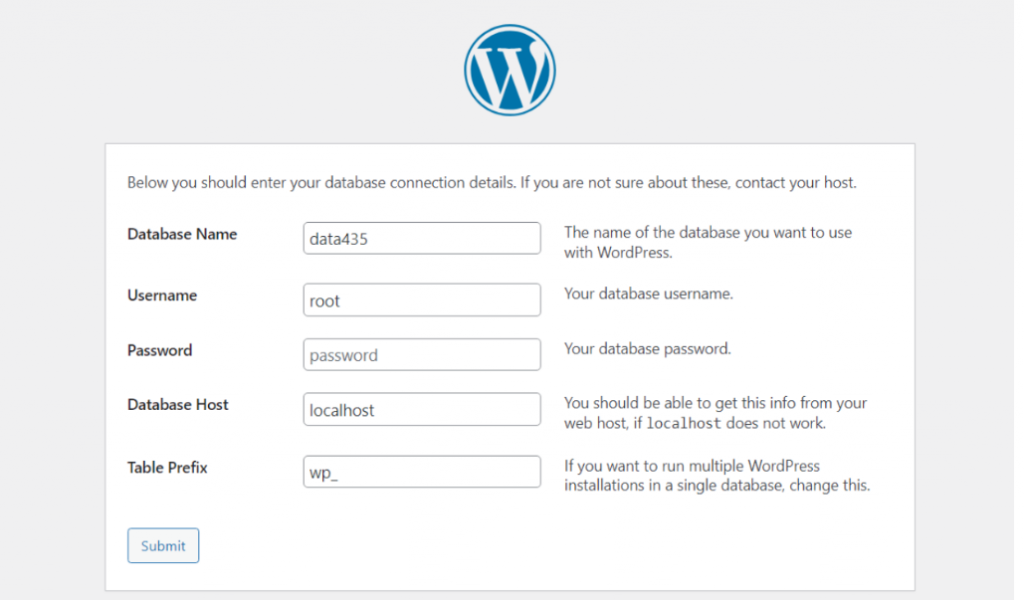
Select language, and the installer will remind you to enter the database name, password, username, and table prefix to continue.
Leave the database host field as localhost and the table prefix as “wp-“.
Click on submit and enter the website’s username, password, or title.
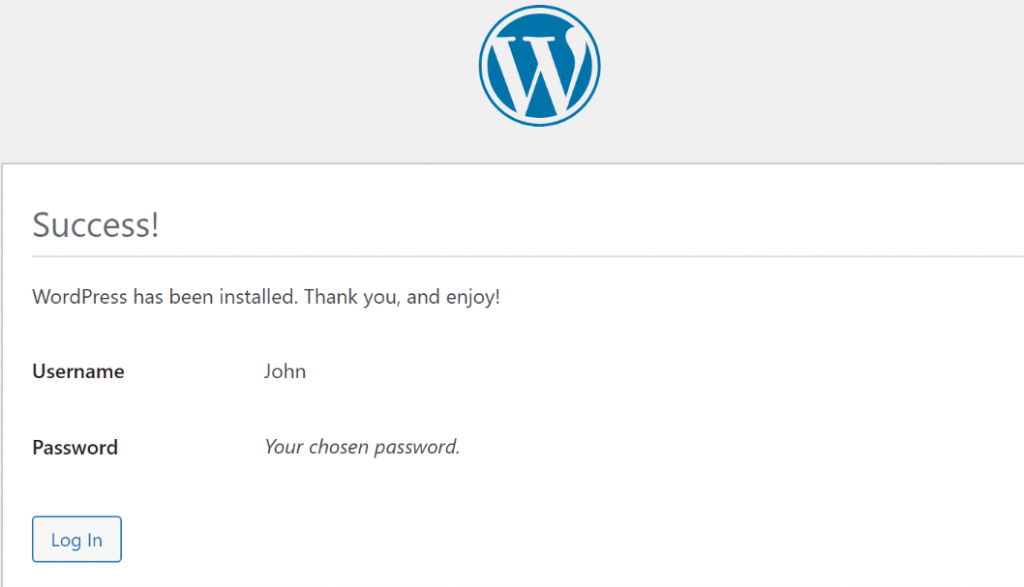
Click Install WordPress to see the success page, then log in to access the dashboard.
Now your WordPress is installed locally, entering localhost/your website URL in the browser, XAMPP is running, and its modules are activating.
If you close XAMPP or stop Apache and MYSQL modules, you cannot connect to the WP local site. To do so, restart the application.
Install WordPress Locally On MacOS
In the following steps, we will walk you through installing WordPress locally on a MacOS device. First, you need to select the right tool, like MAMP.
3. By Download MAMP
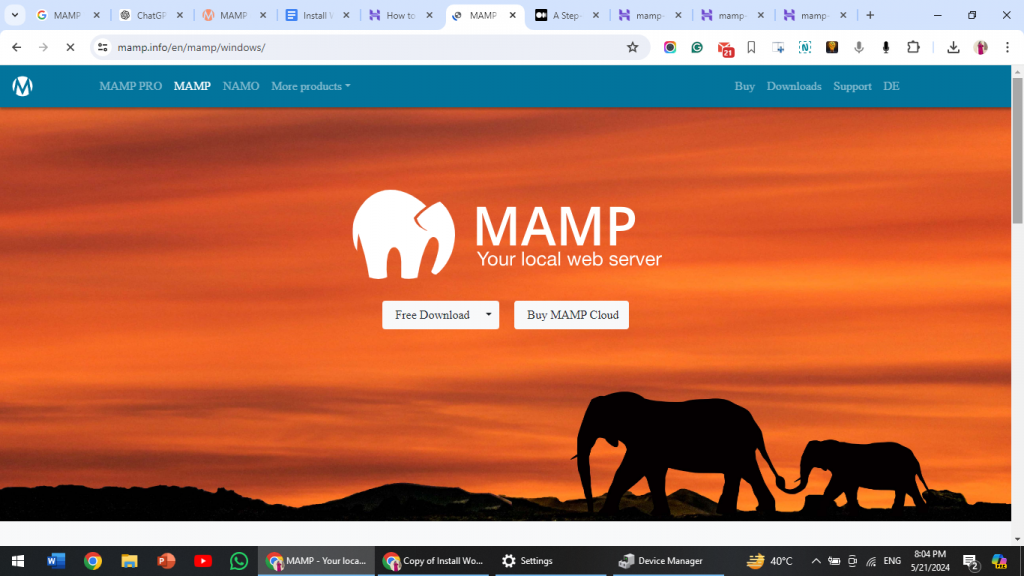
MAMP is one of the most popular tools for creating a local server on MAC devices in seconds. The acronym stands for MySQL, PHP, Apache, and Macintosh, significant elements in running software.
A. Download And Install MAMP
Visit the MAMP website and download the macOS version.
Open the downloaded file and follow the next instructions.
Wait to complete installation.
B. Customize Preference
Launch MAMP and go to preference to ports.
Set the Apache port to 80, keep the Nginx port at 8888, and keep the MySQL port at 8889, then press “ok.”
Go to preference > web server and choose the folder to store the website.
After making changes, click ok.
C. Download and Move WordPress
- Download WordPress from WordPress.org.
- Extract the ZIP file and copy the desired folder
- Navigate the application>MAMP>root directory and paste the WordPress folder.
- Rename if desired.
D. Create Database
- Start MAMP and click webstart.
- Go to PHPMyAdmin from the tool menu.
Under database, create a new database with uff8 general ci encoding.
After this, click on Create.
E. Access The Testing Site
Open the web browser and start entering “http://localhost“.
- Fill in the database information, including the database name, username, and password.
- Add localhost to the database host.
- Provide WordPress site details and click Install WordPress.
- Log in to access your testing site.
For troubleshooting, refer to the MAMP support forums. Now, the whole process is complete, and finally, you can install WordPress locally using MAMP.
Install WordPress Locally On Windows, MacOS, And Linux
Docker and Vagrant are compatible with all three operating systems, so you can follow the same steps regardless of which one you are using.
4. With Docker
Docker is an excellent option for more advanced users who want to install WordPress locally. It helps create isolated containers for various tasks, including installing WordPress or building a new WordPress installation in an isolated container. Let’s see the steps to use Docker for WordPress installation:
A. Download And Install Docker:
Download and install Docker from Docker’s official website.
B. Create A Docker-Compose File:
- Create a new directory for your project.
- Create a file named “docker-compose.yml” in the directory with the following content.
version: '3.1'
Services:
wordpress:
image: wordpress
restart: always
Ports:
- 8080:80
environment:
WORDPRESS_DB_HOST: db
WORDPRESS_DB_USER: example user
WORDPRESS_DB_PASSWORD: example pass
WORDPRESS_DB_NAME: exampled
db:
image: mysql:5.7
restart: always
environment:
MYSQL_DATABASE: exampledb
MYSQL_USER: exampleuser
MYSQL_PASSWORD: examplepass
MYSQL_ROOT_PASSWORD: rootpass
version: '3.1'
C. Start Dockers Containers
- Open a terminal or command prompt.
- Go to your folder project and then run.
D. Access WordPress
- Open the web browser and go to “http://localhost:8080“.
- Follow the instructions to set up WP.
E. No Coding Needed
- You don’t need to know how to code, and Docker made it simple.
- With docker, you can easily set up WordPress locally on Windows, Mac OS, and Linux. This method is quick and great for beginners and expert developers.
5. By Using Vagrant
Vagrant is popular due to its simple functioning and adaptability to work on different tasks. For WP developers, vagrant makes it easy to install WordPress locally.
Let’s see all the steps to install Vagrant for local installation of WordPress.
A. Install Vagrant:
Download and install Vagrant from the Vagrant official website.
B. Choose A Vagrant Box:
- Search for a vagrant box with WP that includes a LAMP and LEMP stack.
- Such boxes can be found on websites like Vagrant Cloud and GitHub.
C. Initialize Vagrant:
- Create a new folder for your project.
- Open the terminal /command prompt, then navigate to the project folder.
vagrant init <box-
name>
D. Configure Vagrant File:
- Open the vagrant file in the project folders.
- Modify the vagrant file to specify the box and any additional configuration options.
- Ensure that the box includes a WordPress setup.
- Here’s a basic example of a vagrant file.
Vagrant.configure("2") do
|config|
config.vm.box= "<box-name>"
end
Start the virtual machine and run the following command.
vagrant upE. Access the WordPress installation
- Once the VM is running, access WordPress by navigating to the appropriate URL in the web browser.
- The documentation of the vagrant box you have chosen should provide this URL.
F. Configure WordPress
Follow on-screen instructions to complete the WordPress installation process, which includes setting up a database and creating an admin account.
G. Work With WordPress Vagrant
You can now work with installing WordPress locally with Vagrant just as you would with a live site. Make changes and add text.
You have finished the WP installation process using Vagrant. The installation process’s specifications depend on the Vagrant box you choose. For any additional steps or customization options, refer to the documentation provided with the box.
Local WordPress Installation On Linux
Users can install WordPress locally on Linux, which works slightly differently from MacOS and Windows. One of the most common approaches for installing WordPress on Linux is setting up LAMP, so let’s start by explaining what it is and how it works.
6. By Installing LAMP
If you are using a Linux distribution, you must first download LAMP, install it, and configure it manually.
A. Install Apache & MYSQL:
Update package list.
sudo apt update- Install Apache.
- Confirm Apache is running: Open your browser and go to “http://localhost.“
- Install MySQL.
sudo apt install apache2Verify that MYSQL is running by running the following command.
sudo mysqlAfter installation is complete, determine that the MySQL server is running by using the sudo mysql command in the terminal like this.
Exit the MySQL Prompt
Once PHP is installed, all components in the LAMP stack are completed, but now configure each component to work with the WordPress run locally.
Install PHP and Modules.
sudo apt install php libapache2-mod-php php-mysqlB. Configure LAMP:
- Apache Configuration:
Open the configuration file.
sudo nano /etc/apache2/apache2.confVerify and change the directory section.
<Directory /var/www/>
Options Indexes FollowSymLinks
AllowOverride None
Require all granted
</Directory>
Save and exit.
2. Apache Ports Configuration
Open ports configuration file.
sudo nano /etc/apache2/ports.conf- Check for listen 80 and adjust as needed.
- Save and exit.
C. MYSQL Configuration (If Needed):
Open MYSQL config file.
sudo
nano
/etc/mysql/mysql.conf.d/mysqld.cnf- Find and change the port line if required.
- Save and then exit.
D. Secure MYSQL And Create A Database
Now you have a basic LAMP setup and run MYSQL secure installation. Run command.
sudo mysql_secure_installationEnter “y” to enable validation and password security.
Follow the prompt to set up the root password and improve security.
Create a database.
sudo mysql -u root -p
CREATE DATABASE database_name
DEFAULT CHARACTER SET utf8 COLLATE
utf8_unicode_ci;
SHOW DATABASES;
exit
E. Install WordPress
Download And Extract WordPress.
cd /var/www/html
sudo wget -c
http://wordpress.org/latest.tar.gz
sudo tar -xzvf latest.tar.gz
sudo chown -R www-data:www-
data /var/www/html/wordpress
Open your browser, then jump or navigate to “http://localhost/WordPress” and choose a language.
- Enter the database name, username, password, host, and table prefix.
- Enter the site title, admin username, password, and email.
- Complete the installation and log in.
Conclusion
Installing WordPress on a local host is straightforward and needs developers because everything runs on a computer, and loading times are significantly lower. We can safely test things before a live production environment. You can easily follow any method explained in this comprehensive guide, from WAMP, XAMPP, MAMP, Docker, and Vagrant to LAMP, according to your needs and preferences, to quickly install WordPress locally. Do you have any questions about how to install WordPress locally on Windows, Mac OS, and Linux? Feel free to ask in the comments below.








Leave a Reply